Table of Contents
Wondering How to create an NFT? Creating an NFT (Non-Fungible Token) may appear to be a complicated task but it is fairly straightforward. With the rise of digital art and blockchain technology, many people are eager to explore the world of NFTs. Creating an NFT can provide new opportunities in the digital world by allowing you to tokenize your unique creations.
This guide will walk you through each step, from understanding NFTs to creating and selling your digital assets. Whether you’re an artist, musician, or content creator, this tutorial will guide you through the exciting world of NFTs. In this guide, we’ll go over how to create an NFT; if you want to learn more about NFTs, check out this guide.
By the end of this guide, you’ll have a clear plan for transforming your digital content into a valuable, tradable asset. Let’s dive in and begin your NFT journey!
Step 1: Choose Your Digital Asset
The first step in creating an NFT is deciding which digital content you want to tokenize. This might be:
- Digital Art: Illustrations, paintings, or graphic designs.
- Music: Original tracks or albums.
- Videos: Short clips, animations, or full-length movies.
- GIFs: Animated images.
- Tweets: Social media posts.
It is important to ensure that you own the intellectual property rights to the content you intend to convert into an NFT.
Tokenizing someone else’s work without permission can result in legal issues. After you’ve chosen your digital asset, you’re ready to proceed to the next steps in the NFT creation process.
Step 2: Select a Blockchain
Next, select a blockchain to host your NFT. The blockchain you select will serve as the foundation for your NFT’s creation, storage, and transaction history. Here are a few popular choices:
- Ethereum: The most popular blockchain for NFTs, known for its strong ecosystem and broad adoption. It supports the ERC-721 and ERC-1155 token standards, which were created specifically for NFTs.
- Binance Smart Chain: An alternative to Ethereum that charges lower transaction fees and processes transactions faster. It implements the BEP-721 and BEP-1155 token standards for NFTs.
- Flow by Dapper Labs: Developed specifically for digital collectibles and large-scale applications. It is known for hosting popular projects such as NBA Top Shot.
- Tezos: An energy-efficient blockchain that charges lower fees and supports a variety of NFT standards.
Choosing the right blockchain depends on transaction costs, speed, and the specific features required for your NFT project. Once you’ve decided on a blockchain, you can create a digital wallet that is compatible with it.
Step 3: Set Up a Digital Wallet
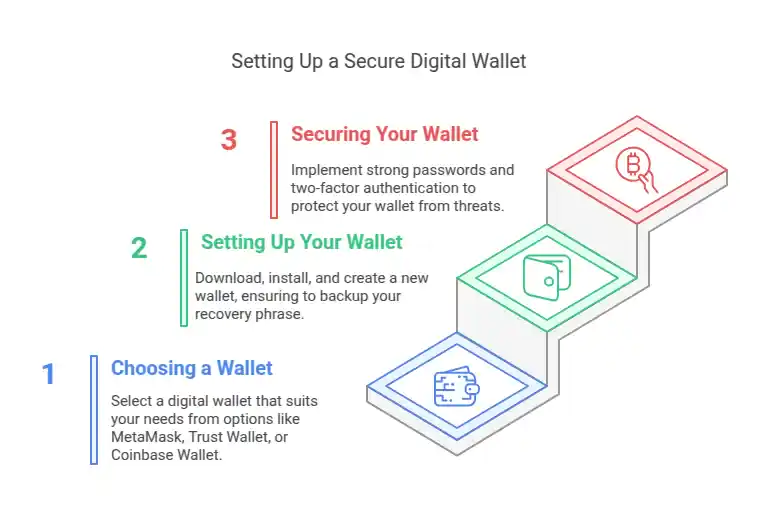
A digital wallet is required for creating, storing, and managing NFTs and cryptocurrencies. Here’s a closer look at this important step.
- Choosing a Wallet:
- MetaMask: A popular Ethereum wallet that also supports other blockchains. It is available as both a browser extension and a mobile app, making it easy to use.
- Trust Wallet: A versatile wallet that works with multiple blockchains, including Ethereum, Binance Smart Chain, and more. It is user-friendly and works well on mobile devices.
- Coinbase Wallet: A secure wallet from Coinbase, a popular cryptocurrency exchange. It supports a wide range of cryptocurrencies and NFTs, with a strong focus on security and usability.
- Setting Up Your Wallet:
- Download and Install: Select your preferred wallet and download it from the official website or app store.
- Create a New Wallet: To create a new wallet, simply follow the prompts. Creating a strong password is required.
- Backup Your Recovery Phrase: During the setup, you will be given a recovery phrase (typically 12-24 words). Make a note of this phrase and keep it somewhere safe. You will need this phrase if you lose access to your wallet.
- Securing Your Wallet:
- Use a Strong Password: Ensure that your wallet password is unique and difficult to guess.
- Enable Two-Factor Authentication (2FA): If your wallet supports it, turn on 2FA for an extra layer of security.
- Be Cautious with Phishing Attacks: To avoid phishing scams, always verify URLs and email sources before accessing your wallet or performing transactions.
With your digital wallet set up and secure, you’ll be able to safely store your NFTs and cryptocurrencies, paving the way for the next steps in building and managing your NFT portfolio.
Step 4: Buy Cryptocurrency
To mint your NFT, you’ll need cryptocurrency to cover the associated fees. Here’s how to get started.
- Choose a Cryptocurrency Exchange:
- Coinbase: A user-friendly platform for beginners that supports a variety of cryptocurrencies, including Ethereum (ETH).
- Binance: Known for its low fees and extensive selection of cryptocurrencies.
- Kraken: Offers strong security features and a wide range of cryptocurrency options.
- Sign Up and Verify Your Account:
- Create an Account: Sign up for your selected exchange by entering your email address and creating a password.
- Verify Your Identity: To ensure compliance with regulations, most exchanges require identity verification. This usually requires submitting a photo ID and possibly additional documentation.
- Purchase Ethereum (ETH):
- Deposit Funds: Transfer funds into your exchange account via bank transfer, credit card, or other supported methods.
- Buy ETH: Navigate to the trading section and select Ethereum. Enter the amount you wish to purchase and complete the transaction.
- Transfer ETH to Your Digital Wallet:
- Get Your Wallet Address: Open your digital wallet (e.g., MetaMask, Trust Wallet) and copy your unique wallet address.
- Initiate the Transfer: Go back to your exchange account, select Ethereum, and choose the option to withdraw or send. Paste your wallet address and follow the prompts to transfer your ETH.
- Confirm the Transaction:
- Wait for Confirmation: Blockchain transactions can take a few minutes to process. Ensure the ETH has arrived in your wallet before proceeding to mint your NFT.
By following these steps, you’ll have the necessary ETH in your digital wallet, ready to cover the minting fees for your NFT. This sets the stage for the next steps in creating and listing your digital assets.
Step 5: Choose an NFT Marketplace
Selecting the right marketplace is a crucial step in creating and selling your NFT. Each platform offers unique features, rules, and fee structures. Here are some popular options:
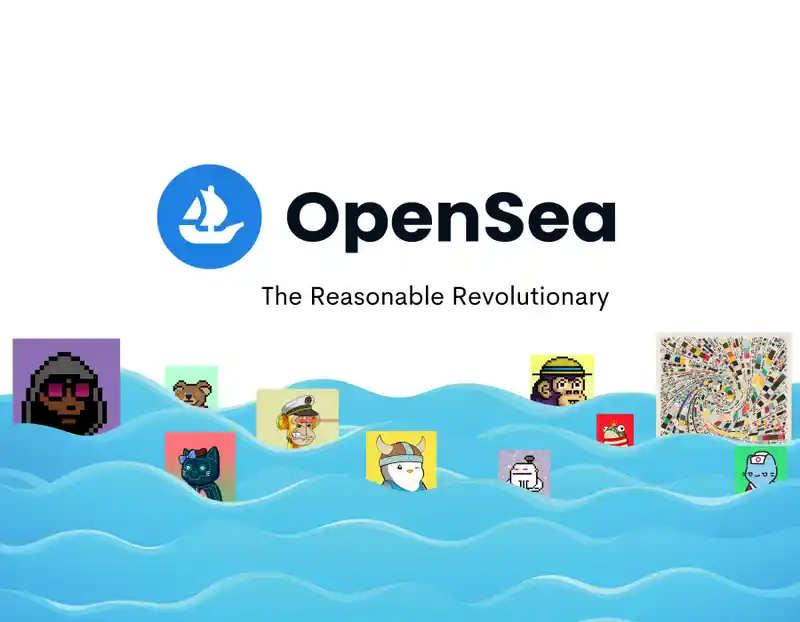
- OpenSea:
- Overview: The largest and most popular NFT marketplace, supporting a wide range of digital assets including art, collectibles, and domain names.
- Features: User-friendly interface, extensive support for various NFT standards, and robust community.
- Fees: Charges a 2.5% fee on sales.
- Rarible:
- Overview: A decentralized marketplace that allows users to create and sell NFTs easily.
- Features: Supports both fixed price and auction sales, community governance through RARI tokens, and the ability to create multiple editions of an NFT.
- Fees: Charges a 2.5% fee on both the buyer and seller.
- Mintable:
- Overview: A user-friendly platform that simplifies the NFT creation process, making it accessible to beginners.
- Features: Offers two types of minting – “Gasless” minting (no upfront cost) and “Traditional” minting (requires gas fees).
- Fees: Charges a 2.5% fee for “Traditional” minting and a 5% fee for “Gasless” minting.
How to Choose the Right Marketplace:
- Evaluate Your Needs: Consider what type of digital asset you’re creating. Some platforms are better suited for specific types of NFTs.
- Compare Fees: Look at the fee structures to understand how much you’ll be paying for minting and selling your NFTs.
- Community and Support: Choose a platform with a strong community and good customer support to help you navigate any challenges.
Once you’ve chosen a marketplace, you’ll be ready to start the process of minting your NFT and listing it for sale. This will bring you one step closer to showcasing and monetizing your digital creations.
Step 6: Connect Your Wallet to the Marketplace
Connecting your digital wallet to your chosen NFT marketplace is an essential step to start creating and selling your NFTs. Here’s how you can do it:
- Navigate to the Marketplace:
- Open the website of the NFT marketplace you have chosen (e.g., OpenSea, Rarible, Mintable).
- Find the Wallet Icon:
- Look for the wallet icon or a button labeled “Connect Wallet.” This is usually located in the top-right corner of the website.
- Select Your Wallet Provider:
- Click on the wallet icon, and you will be presented with a list of supported wallet providers. Common options include MetaMask, Trust Wallet, and Coinbase Wallet.
- Authorize the Connection:
- Choose your wallet provider from the list. A pop-up window will appear prompting you to authorize the connection.
- If using a browser extension like MetaMask, the extension will open automatically. For mobile wallets, you may need to scan a QR code or approve the connection within the wallet app.
- Follow the Instructions:
- Follow the on-screen instructions to complete the connection. This usually involves approving the connection request and granting necessary permissions for the marketplace to interact with your wallet.
- Ensure you are connected to the correct blockchain network that the marketplace supports (e.g., Ethereum Mainnet).
- Confirm the Connection:
- Once connected, you should see your wallet address displayed on the marketplace, indicating a successful connection.
- You might also see your wallet balance and other details, confirming that your wallet is now linked to the marketplace.
By connecting your wallet to the NFT marketplace, you enable the platform to access your wallet for transactions, such as minting NFTs, listing them for sale, and receiving payments. This connection is secure, and you maintain control over your assets at all times, only authorizing specific transactions as needed. Now you’re ready to start creating and managing your NFTs on the marketplace!
Step 7: Mint Your NFT
To mint an NFT, you have to convert your digital file into a unique token on the blockchain. You can follow the steps below to get started:
- Review Your Details:
- Before minting, make sure all the details you entered during the creation phase (title, description, properties, stats, unlockable content) are accurate and complete.
- Double-check the royalty percentage you’ve set, ensuring it matches your expectations for future sales.
- Initiate the Minting Process:
- On the NFT marketplace, locate the “Mint” or “Create” button. Clicking this will start the minting process.
- You may be asked to confirm one last time before proceeding. If you need to make any final adjustments, this is the time to do so.
- Understand Gas Fees:
- What Are Gas Fees?: These are transaction fees paid to the blockchain network to process and validate your transaction. The amount of the gas fee can vary based on network congestion and the complexity of the transaction.
- Estimate Costs: Some platforms provide an estimate of the current gas fees. Be prepared for fluctuations and ensure you have sufficient cryptocurrency in your wallet to cover these fees.
- Authorize the Transaction:
- Once you’re ready, you’ll need to authorize the minting transaction through your connected digital wallet (e.g., MetaMask, Trust Wallet).
- A pop-up window will appear from your wallet prompting you to confirm the transaction and pay the gas fee.
- Review the details in your wallet, including the gas fee, and confirm the transaction.
- Wait for Confirmation:
- After authorizing the transaction, the minting process will begin. This involves adding your NFT to the blockchain, which can take a few moments depending on network activity.
- You’ll receive a notification once the transaction is confirmed and your NFT is successfully minted.
- Verify Your NFT:
- Navigate to your profile or NFT collection on the marketplace to view your newly minted NFT.
- Ensure all the details are correct and that the NFT is listed as expected.
By following these steps, you’ll successfully mint your NFT, officially turning your digital file into a unique token on the blockchain. This process not only secures your digital asset but also makes it available for trading, selling, or showcasing on the NFT marketplace.
Step 8: List Your NFT for Sale
Once you have minted your NFT, you will need to list it on the market. Here’s how you can do it:
- Navigate to Your NFT:
- Go to your profile or NFT collection on the marketplace where your newly minted NFT is displayed.
- Select the Listing Option:
- Click on your NFT to open its detailed view.
- Look for options like “Sell” or “List for Sale” and click on them to begin the listing process.
- Choose Your Sale Type:
- Fixed Price: Specify a price for your NFT. Buyers can instantly buy it for this price.
- Auction: Set a starting bid and auction duration. Potential buyers will place bids, and the highest bid at the end of the auction wins.
- Set Your Price:
- For a fixed-price sale, enter the amount in cryptocurrency (e.g., ETH) that you want to sell your NFT for.
- For an auction, specify the starting bid and choose the auction duration (e.g., 1 day, 7 days).
- Review Listing Fees:
- Be aware of any listing fees that the marketplace charges. These fees are typically a percentage of the sale price and may vary by platform.
- Confirm the Listing:
- Review all the details of your listing, including the price, sale type, and duration.
- Confirm and authorize the listing through your connected digital wallet. This may involve a small transaction fee for listing the NFT.
- Promote Your NFT:
- Social Media: Share your NFT on platforms like Twitter, Instagram, and Facebook to reach a wider audience.
- NFT Communities: Engage with NFT communities on Discord, Reddit, and specialized forums to attract potential buyers.
- Collaborations and Partnerships: Partner with influencers or other creators to promote your NFT to their followers.
By listing your NFT for sale and promoting it effectively, you increase the chances of attracting buyers and making a successful sale. This step is crucial for monetizing your digital asset and gaining visibility in the NFT marketplace.
Step 9: Manage Your NFT
Once your NFT is listed for sale, it’s important to actively manage it to ensure its success. Here’s how you can effectively manage your NFT:
- Track Performance:
- Monitor Views and Bids: Keep an eye on how many views your NFT is getting and any bids placed if it’s an auction.
- Analytics Tools: Use any analytics tools provided by the marketplace to track engagement and performance metrics.
- Engage with Buyers:
- Respond to Inquiries: Answer questions potential buyers may have about your NFT promptly and professionally.
- Build Relationships: Connect with your buyers and collectors, showing appreciation and building a community around your work.
- Promote Continuously:
- Social Media Updates: Regularly update your social media to keep your audience engaged and informed about your NFT.
- Collaborations: Partner with other creators or influencers to cross-promote each other’s work.
- Adjust Listings if Necessary:
- Price Adjustments: If your NFT isn’t selling, consider adjusting the price or offering a limited-time discount.
- Relist: If an auction ends without a sale, you can relist your NFT with new terms.
- Create More NFTs:
- Expand Your Collection: Continue creating and minting new NFTs to build a diverse collection.
- Themed Collections: Consider creating themed series or collections to attract collectors interested in specific types of digital assets.
- Stay Updated on Market Trends:
- Follow Trends: Keep up with the latest trends in the NFT market to understand what types of NFTs are in demand.
- Adapt Strategies: Adjust your strategies based on market insights to stay relevant and competitive.
By actively managing your NFT, tracking its performance, and engaging with your buyers, you can enhance its visibility and potential for sale. Building a collection and staying updated on market trends will help you grow as an NFT creator and attract a loyal following.
Conclusion
Creating and selling an NFT involves several key steps, each crucial to transforming your digital content into a unique, tradable asset. Here’s a quick recap:
- Choose Your Digital Asset: Decide on the content you want to tokenize and ensure you own the intellectual property rights.
- Select a Blockchain: Pick a suitable blockchain, such as Ethereum, Binance Smart Chain, or Flow by Dapper Labs.
- Set Up a Digital Wallet: Use wallets like MetaMask, Trust Wallet, or Coinbase Wallet to store your NFTs and cryptocurrencies securely.
- Buy Cryptocurrency: Purchase the needed cryptocurrency, like Ethereum (ETH), to cover minting fees via exchanges like Coinbase, Binance, or Kraken.
- Choose an NFT Marketplace: Select a marketplace such as OpenSea, Rarible, or Mintable that fits your needs.
- Connect Your Wallet to the Marketplace: Link your digital wallet to the chosen marketplace to enable transactions.
- Create Your NFT: Upload your digital file, add necessary details, set royalties, and add unique properties or unlockable content.
- Mint Your NFT: Confirm the details and authorize the minting process, which involves a gas fee.
- List Your NFT for Sale: Decide on a fixed price or auction, and promote your NFT to attract buyers.
- Manage Your NFT: Track performance, engage with buyers, and continuously promote and expand your collection.
By following these steps, you can effectively navigate creating, minting, and selling NFTs, opening up new opportunities for monetizing your digital creations.
Engaging with the community, staying updated on market trends, and actively managing your NFTs will help you build a successful presence in the exciting world of NFTs. Happy minting!
FAQs
Q1: What is an NFT?
A: An NFT (Non-Fungible Token) is a unique digital asset that is verified using blockchain technology. Unlike cryptocurrencies, NFTs are unique and cannot be traded one-on-one.
Q2: Do I need to own the intellectual property rights to create an NFT?
A: Yes, you must have intellectual property rights to the content you’re tokenizing. Minting someone else’s work without permission can result in legal issues.
Q3: What is a gas fee, and why do I need to pay it?
A: A gas fee is a transaction fee paid to the blockchain network to process and validate your transaction. Gas fees are required for minting NFTs and can vary depending on network congestion.
Q4: Which blockchain should I use for my NFT?
A: Ethereum is the most popular blockchain for NFTs due to its strong ecosystem. Depending on your requirements, other options such as Binance Smart Chain, Flow by Dapper Labs, and Tezos may be more suitable.
Q5: How do I choose the right NFT marketplace?
A: Choose a marketplace based on its fees, user interface, community support, and the type of digital asset you’re creating. Popular choices include OpenSea, Rarible, and Mintable.
Q6: What are royalties, and how do I set them?
A: Royalties are a percentage of the sale price that you receive each time your NFT is resold on the secondary market. You can specify the royalty percentage during the NFT creation process.
Q7: How can I promote my NFT?
A: Promote your NFT via social media platforms such as Twitter, Instagram, and Facebook. Connect with NFT communities via Discord, Reddit, and specialized forums. Consider working with influencers and other creators.
Q8: What should I do if my NFT doesn’t sell?
A: If your NFT does not sell, consider lowering the price, offering a limited-time discount, or relisting it under new terms. To increase visibility, actively promote your NFT and engage with potential buyers.
Q9: Can I create multiple NFTs?
A: Yes, you can make multiple NFTs and have a diverse collection. Consider creating themed series or collections to attract collectors who are interested in certain types of digital assets.
Q10: How do I ensure the security of my digital wallet?
A: Use a strong password, turn on two-factor authentication (2FA) if available, and be careful of phishing attacks. Always back up your recovery phrase and keep it somewhere safe.