Table of Contents
Just over a year ago, ChatGPT emerged as a groundbreaking AI chatbot, astonishing many with its ability to efficiently handle tasks like summarizing articles or crafting detailed travel itineraries. Now, OpenAI has introduced an even more exciting development: the ability for anyone to create their own version of ChatGPT, known as GPTs. These custom models can be tailored to meet both personal and business needs in just minutes. This advancement not only adds significant power to your workflows but also simplifies the automation process with ChatGPT.
Here’s a structured guide on how to build your own custom ChatGPT using OpenAI’s GPT builder. But before that lets know a bit about technology behind ChatGPT
Understanding the Technology Behind ChatGPT
- The Transformer Model: Essential to ChatGPT, transformers are a type of deep learning model architecture used in natural language processing, introduced in 2017.
- Generative Pre-trained Transformers (GPTs): These models, including the latest GPT-4 Turbo, are based on transformers and have evolved to produce increasingly coherent text.
ChatGPT: A Conversational AI
- Development and Capabilities: ChatGPT, developed by OpenAI, originally used the GPT-3 model and has now integrated GPT-4 for Plus users. It is designed to provide helpful, safe, and honest interactions.
- Functional Limitations: Despite its wide-ranging capabilities, ChatGPT has certain knowledge limitations.
Personalizing Your ChatGPT
- OpenAI’s Announcement: Recent developments have enabled users to create their own versions of ChatGPT, tailor-made for individual or business needs.
- Why Create Custom GPTs?: Custom GPTs can serve as personal virtual assistants, automate tasks like email responses, and enhance business AI tools.
Preparing to Create Your Custom GPT
- Account Requirements: Access to ChatGPT Plus or Enterprise account is necessary.
- No Coding Needed: The process is designed to be straightforward, requiring no technical skills or special software.
Setting Your Goals
- Defining Objectives: Before starting, identify the tasks for automation, the desired tone and persona of your GPT, and potential integrations with data sources or APIs.
- Optimizing Your GPT: With clear goals, tailor your GPT to your specific needs and creative ideas.
This guide provides a comprehensive understanding and practical approach on How To Build Your Own Custom ChatGPT that aligns with your unique requirements, whether for personal use or business applications.
A step-by-step guide to help you through the process of “How To Build Your Own Custom ChatGPT”
Here are the 6 easy steps on How To Build Your Own Custom ChatGPT :
1. Log in to Your OpenAI Account
- Prerequisite: Have a ChatGPT Plus or Enterprise account.
- Action: Visit OpenAI’s login/signup page and log in.
- Troubleshooting: If you encounter login issues, reload the page and refer to OpenAI’s troubleshooting tips for assistance.
2. Create Your GPT
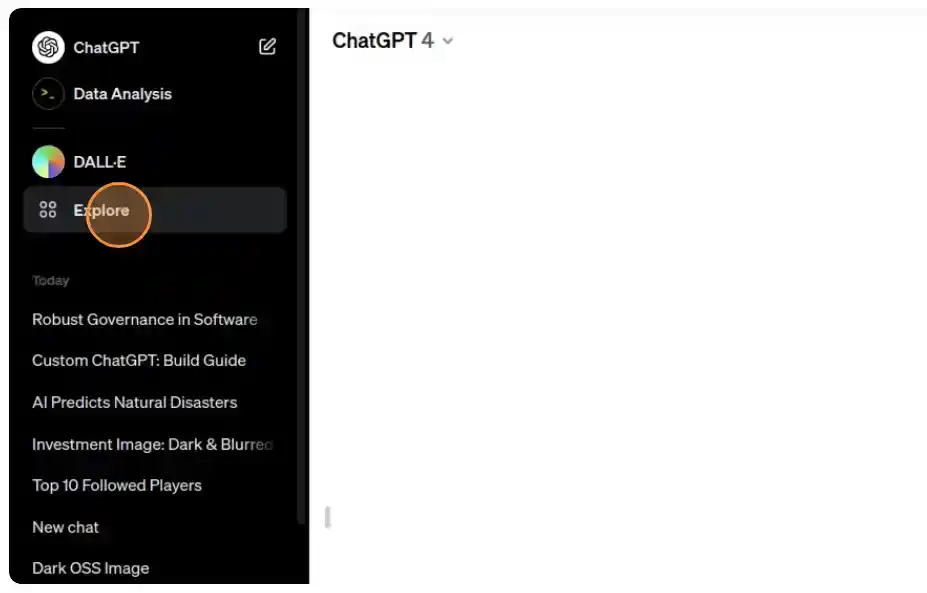
- Navigation: In the OpenAI interface, click on ‘Explore’ in the sidebar.
- Starting the Builder: Select ‘Create a GPT’ to initiate the process.
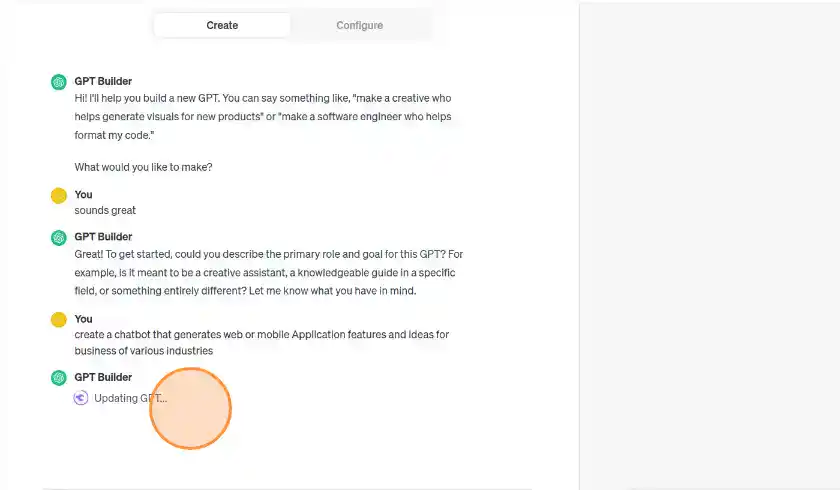
- Using the GPT Builder:
- The builder displays a split screen – ‘Create’ panel for input and ‘Preview’ panel for interaction.
- Enter your prompts in the ‘Create’ panel. This is where you specify what you want your chatbot to do or know.
- Interact with your chatbot in the ‘Preview’ panel to see how it responds to your inputs, helping you refine its capabilities.

3. Configure Your GPT
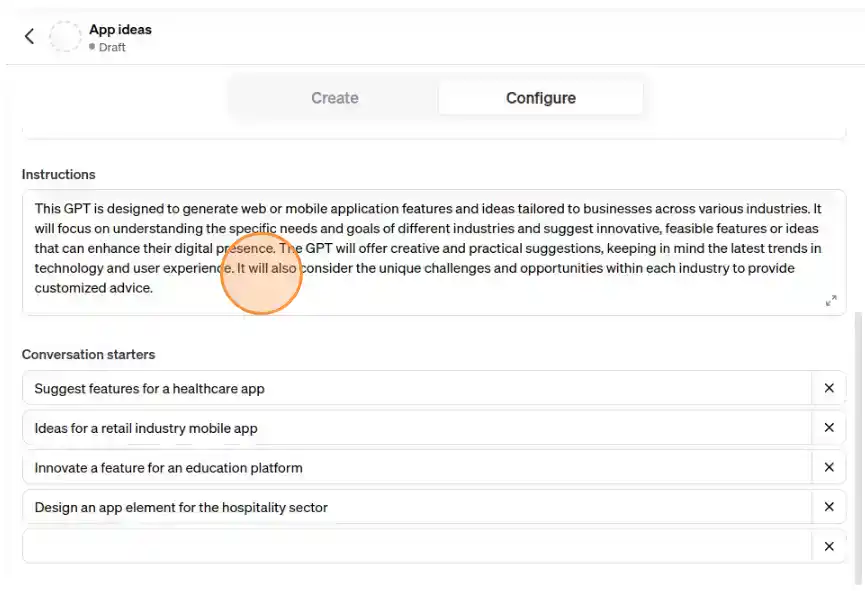
- Advanced Customization: Click ‘Configure’ for more settings.
- Personalization Options:
- Profile Picture: Set or change the chatbot’s profile picture, using your own image or creating one with DALLE·3.
- Instructions: Modify or add instructions to guide your chatbot’s behavior.
- Conversation Starters: Add or remove prompts to facilitate initial interactions.
- Knowledge Files: Upload documents or text files that the chatbot can use as a reference for its responses.
4. Save Your GPT
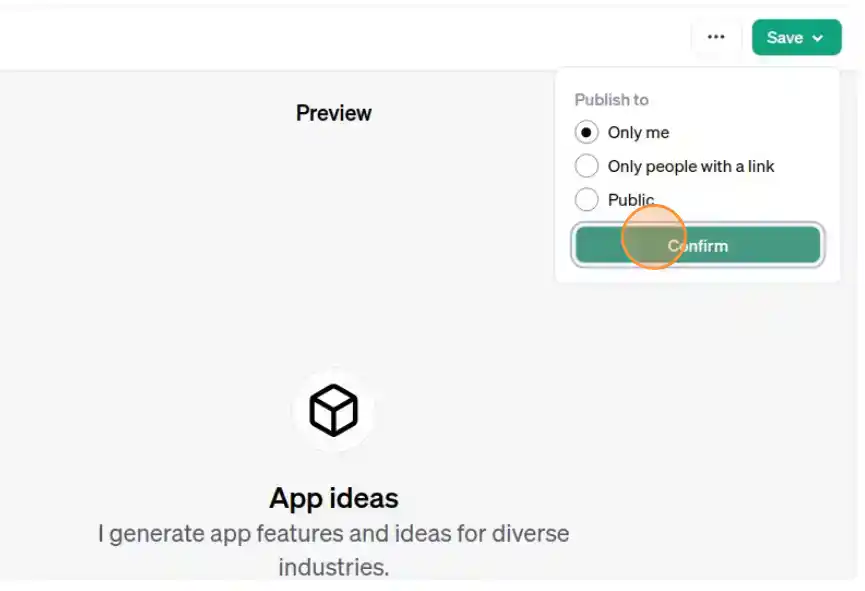
- Finalization: Once you’re satisfied with the setup, click ‘Save’ (or ‘Update’ if you’re modifying an existing GPT).
- Sharing Preferences: Choose who can interact with your chatbot – options include ‘Only me’, ‘Only people with a link’, ‘Public’, or ‘Anyone at [your company]’ for Enterprise plans.
5. Test Your Custom GPT
- Accuracy Check: Interact with your custom GPT extensively to ensure it responds accurately and appropriately. Since the GPT builder is in beta, this step is crucial to verify its reliability.
6. Share Your GPT
- Distribution: To share your GPT, go to ‘Explore’, select the GPT you want to share, click the down caret next to the chatbot’s name, and then ‘Copy link’.
- Spread the Word: Paste and share this link with your intended audience.
Editing Your Custom ChatGPT
Editing your custom ChatGPT is a straightforward process, although it might not be initially intuitive:
- Access the Edit Feature:
- Navigate to the sidebar and click on ‘Explore’.
- Locate the GPT you wish to modify and click ‘Edit’ next to it.
- Update Your GPT:
- Make the necessary changes in your GPT’s settings.
- Once done, click ‘Update’ and then confirm your changes by clicking ‘Confirm’.
Deleting Your Custom ChatGPT
If you need to delete your custom GPT:
- Navigate to GPT Settings:
- Click on ‘Explore’ in the sidebar.
- Delete the GPT:
- Find the GPT you want to remove and click the ‘More’ icon (ellipsis).
- Select ‘Delete GPT’ and confirm the action in the pop-up window.
This process allows you to maintain control over your custom ChatGPTs, ensuring they stay relevant and useful for your needs.
Additional Tips
- Regular Updates: Periodically return to your custom GPT to update and improve it based on new needs or feedback.
- Privacy Considerations: Be mindful of the data and information you upload, especially sensitive or personal content.
- API Integrations: Explore integrating your GPT with external APIs for enhanced functionalities, like fetching real-time data or automating specific tasks.
By following these steps, you’ll be able to create a custom ChatGPT model that suits your specific requirements, whether for personal assistance, business applications, or simply exploring the capabilities of AI and machine learning.