Table of Contents
If you’ve ever thought about building a Chrome extension but didn’t know where to start, this blog is for you. In this tutorial, I’ll walk you through creating a simple Chrome extension that shows a random motivational quote when clicked. We’ll use basic web technologies like HTML, CSS, and JavaScript to create this extension.
By the end of this guide, you’ll not only have a working Chrome extension but also a solid understanding of how it works.
What Are Chrome Extensions?
Before we dive in, let’s briefly talk about what a Chrome extension is. A Chrome extension is a small software program that customizes your browsing experience. These extensions can help automate tasks, modify content on web pages, or provide useful tools—directly from your Chrome browser. The best part is that you can create one with just a few lines of code.
Project Overview

We’re going to build an extension that shows a random motivational quote every time you click on its icon in the browser. It will have:
- A small popup window that displays when you click the extension icon.
- A button to get a new quote each time it’s clicked.
- A simple, clean design using HTML, CSS, and JavaScript (you can use any library to make it a better example ).
Let’s get started!
Step-by-Step Guide to Create the Chrome Extension
1. Setting Up the Project
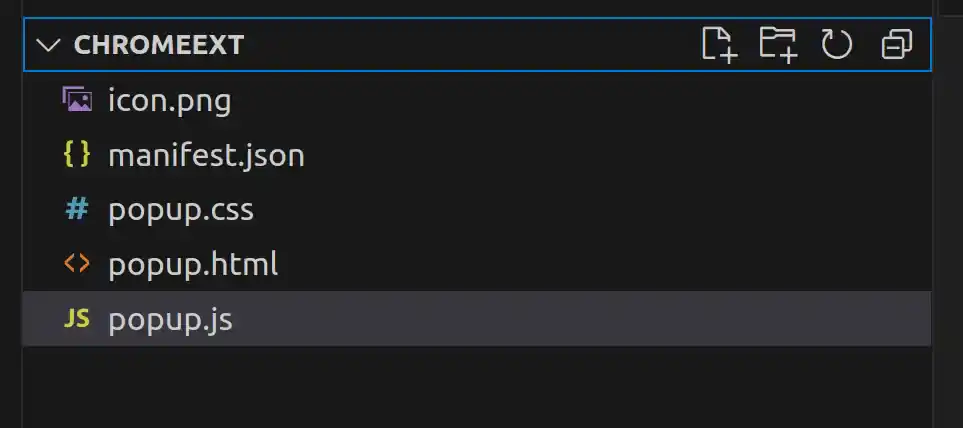
The first thing we need to do is set up the project folder. This folder will contain all the files necessary for our extension. Create a folder on your computer and name it something like MotivationExtension. Inside this folder, you’ll need the following files:
manifest.json– This is the main configuration file for the Chrome extension.popup.html– This file will define the structure of the popup window.popup.css– This file will style the popup window.popup.js– This file will handle the JavaScript logic.icon.png– The icon that will be displayed in the Chrome toolbar.
2. Writing the Manifest File
The manifest file is crucial because it tells Chrome how to run your extension. Without this file, your extension won’t work.
In your project folder, create a file named manifest.json and add the following code:
{
    "manifest_version": 3,
    "name": "Motivation Extension",
    "version": "1.0",
    "description": "Get a motivational quote every time you click the icon.",
    "action": {
      "default_popup": "popup.html",
      "default_icon": {
        "16": "icon.png",
        "48": "icon.png",
        "128": "icon.png"
      }
    },
    "permissions": []
  }
Here’s what each part does:
manifest_version: Currently use manifest version 3, which improves security and performance.name,version, anddescription: These fields are self-explanatory. They tell users what your extension is called, its version number, and a short description of what it does.action: This defines what happens when the extension icon is clicked. In our case, it opens thepopup.htmlfile.default_icon: The icon that will appear in the toolbar when the extension is active.permissions: Although we don’t need any special permissions for this extension, you can request them here (e.g., access to certain websites or user data).
3. Building the HTML Structure
Now that our manifest is ready, we can create the actual user interface of our extension. In this step, we’ll define what the popup window looks like using basic HTML.
Create a new file in the project folder called popup.html and add the following code:
<!DOCTYPE html>
<html lang="en">
<head>
  <meta charset="UTF-8">
  <meta name="viewport" content="width=device-width, initial-scale=1.0">
  <link rel="stylesheet" href="popup.css">
  <title>Motivational Quote</title>
</head>
<body>
  <div class="container">
    <h1>Daily Motivation</h1>
    <p id="quote">Click to get inspired!</p>
    <button id="getQuote">Get Quote</button>
  </div>
  <script src="popup.js"></script>
</body>
</html>
Here’s what each part does:
- The
h1tag is for the title, and theptag with the IDquotewill hold our motivational quotes. - There’s also a button with the ID
getQuotethat will trigger the JavaScript function to display a new quote.
4. Styling the Popup
Next, let’s make our popup visually appealing. Create a file called popup.css in the project folder and add this styling:
body {
    font-family: Arial, sans-serif;
    margin: 0;
    padding: 0;
    width: 250px;
    height: 150px;
    background-color: #f4f4f4;
    display: flex;
    justify-content: center;
    align-items: center;
  }

  .container {
    text-align: center;
  }

  button {
    margin-top: 10px;
    padding: 8px 16px;
    background-color: #007bff;
    color: white;
    border: none;
    border-radius: 4px;
    cursor: pointer;
  }

  button:hover {
    background-color: #0056b3;
  }

  #quote {
    margin-bottom: 10px;
    font-size: 1.2em;
    color: #333;
  }
This simple CSS ensures that our popup has a clean, centered layout. The button is styled to have a blue background, and it changes color when hovered.
5. Adding JavaScript Functionality
Now let’s make the button functional. When clicked, it will show a random motivational quote. In the project folder, create a file named popup.js and add the following JavaScript code:
const quotes = [
    "Believe you can and you're halfway there.",
    "The only way to do great work is to love what you do.",
    "Success is not the key to happiness. Happiness is the key to success.",
    "Your limitation—it’s only your imagination.",
    "Dream it. Wish it. Do it."
  ];

  document.getElementById("getQuote").addEventListener("click", () => {
    const randomQuote = quotes[Math.floor(Math.random() * quotes.length)];
    document.getElementById("quote").textContent = randomQuote;
  });
Here’s what each part does:
- We’ve created an array of motivational quotes.
- When the user clicks the “Get Quote” button, the
addEventListenerthe function runs, picking a random quote from the array and displaying it in the#quoteelement.
6. Adding an Icon
To display the data values inside the bars, you can use text elements and position them dynamically.
The final step in building our extension is adding an icon. This icon will appear in the Chrome toolbar and represent our extension. You can design a simple icon or download one from free resources like Icons8.
Place your icon image (named icon.png) in the project folder. The manifest file will automatically use this image for different icon sizes (16×16, 48×48, 128×128).
7. Testing the Chrome Extension
Now that all the files are in place, it’s time to test your extension.
- Open Chrome and navigate to
chrome://extensions/. - Enable Developer mode by toggling the switch in the top-right corner.
- Click “Load unpacked” and select the folder where your extension files are located.
- Your extension should now appear in the list of installed extensions, and its icon should be visible in the toolbar.
Click on the icon, and you should see the popup with the “Get Quote” button. Press the button, and a random motivational quote will appear!
Output
Conclusion
Building a Chrome extension is easier than you might think. With just HTML, CSS, and JavaScript, you can create useful browser tools and even publish them for the world to use. The motivational quote extension we built here is a great starting point for learning more about Chrome extensions.
From here, you can start adding more complex features or developing entirely new extensions. Happy coding!