Table of Contents
Introduction
Building a Hackintosh—a non-Apple computer running macOS—can seem daunting, but with the right tools and guidance, it’s a highly rewarding process. Whether you’re looking to save money, experiment with mac operating system on custom hardware, or create the ultimate development machine, this guide will walk you through each step.
By the end of this blog, you’ll have a fully functional Hackintosh that rivals a Mac in performance and usability.
1. What Is a Hackintosh?
A Hackintosh is a custom-built computer that runs macOS, Apple’s proprietary operating system, on non-Apple hardware. This setup is made possible using tools like OpenCore or Clover bootloader, which emulate the firmware and configurations of a Mac.
Benefits:
- Cost Efficiency: Save money by choosing affordable or powerful components.
- Customization: Fine-tune your machine to your specific needs.
- Learning Opportunity: Understand how macOS works under the hood.
Drawbacks:
- Compatibility Issues: Not all hardware works seamlessly with macOS.
- Legal Considerations: macOS is licensed to Apple hardware.
- Time Investment: It requires patience and technical know-how.
2. System Requirementsajat Patel
Before diving in, ensure you meet the following requirements:
Prerequisites
- [CRUCIAL] Time and patience.
- Don’t start working on this if you have deadlines or important work. Hackintoshes are not something you should be relying on as a work machine.
- Don’t start working on this if you have deadlines or important work. Hackintoshes are not something you should be relying on as a work machine.
- [CRUCIAL]KNOW YOUR HARDWARE
- Your CPU name and its generation
- Your GPUs
- Your storage devices (HDD/SSD, NVMe/AHCI/RAID/IDE configuration)
- Your laptop/desktop model if from an OEM
- Your Ethernet chipset
- Your WLAN/Bluetooth chipset
- [CRUCIAL]A BASIC KNOWLEDGE OF COMMAND LINES AND HOW TO USE A TERMINAL/COMMAND PROMPT
- This is not just [CRUCIAL], this is the basis of this whole guide. We can’t help you if you don’t know how to
cdto a directory or delete a file.
- This is not just [CRUCIAL], this is the basis of this whole guide. We can’t help you if you don’t know how to
- [CRUCIAL] A machine that is compatible as seen in the Compatibility section.
- [CRUCIAL] A minimum of:
- 16GB USB if you’re going to use macOS to create the USB
- 4GB USB if you’re going to use Windows or Linux for USB creation
- [CRUCIAL] An Ethernet connection (no WiFi dongles, Ethernet USB adapter may work depending on macOS support) and you must know your LAN card’s model
- You must either have a physical Ethernet port, or a compatible macOS Ethernet dongle/adapter. In case you have a compatible WiFi card (opens new window), you can also use that.
- Note the majority of WiFi cards are not supported by macOS
- For people who can’t use ethernet but have an Android phone, you can connect your Android phone to WiFi and then tether it using USB with HoRNDIS (opens new window).
- You must either have a physical Ethernet port, or a compatible macOS Ethernet dongle/adapter. In case you have a compatible WiFi card (opens new window), you can also use that.
- [CRUCIAL]Proper OS Installation:
- Be it:
- macOS (a fairly recent one would be better)
- Windows (Windows 10, 1703 or newer)
- Linux (Clean and properly functioning, with Python 2.7 or later)
- For Windows or Linux users, 15GB of free space on the drive you’re working on. On Windows, your OS disk (C:) must have at least 15GB of free space.
- For macOS users, 30GB of free space on the system’s drive.
- Most tools used in this guide will also require Python installed(opens new window)
- Be it:
- [CRUCIAL]Latest BIOS installed
- In most cases, updating your BIOS will provide the best support for macOS
- The exception to this are MSI 500-series AMD motherboards, read more at Motherboard Support
Software
- macOS Installer: A copy of macOS (e.g., macOS Ventura or Monterey).
- OpenCore or Clover Bootloader: The most popular tools for Hackintosh boot management.
- Additional Utilities: ProperTree, GenSMBIOS, and MountEFI.
Hardware
Your hardware must be compatible with macOS. Common requirements:
- Processor: Intel or AMD CPUs (with limitations on AMD).
- Motherboard: Supported chipsets (e.g., Z390, Z590, B550).
- Graphics Card: Native macOS support (e.g., AMD Radeon GPUs like RX 580, RX 5700 XT).
- Storage: NVMe or SATA SSDs are highly recommended.
- RAM: Minimum of 8GB; 16GB+ for professional workloads.
3. Choosing the Right Hardware
The choice of hardware determines the success of your Hackintosh. Aim for components that are well-documented in the Hackintosh community.
Recommended Parts:
- CPU: Intel 8th-12th Gen CPUs are most compatible. AMD Ryzen CPUs are viable but require additional steps.
- GPU: AMD GPUs (e.g., RX 580, RX 6700 XT) are more compatible than NVIDIA cards, especially post-macOS Mojave.
- Motherboard: Choose models with supported chipsets and BIOS versions. Avoid unsupported audio and network chips.
- Wi-Fi and Bluetooth: Use macOS-compatible cards, like Fenvi FV-T919.
Research Tools:
- Dortania Guide: Comprehensive hardware compatibility lists.
- TonyMacx86 Forums: Community-driven support and insights.
- OpenCore Compatibility Checker: Ensure your hardware matches OpenCore’s specifications.
4. Preparing Your macOS Installation
Step 1: Gather Required Tools
- A macOS device or virtual machine to create the bootable USB.
- A USB drive with at least 16GB capacity.
- OpenCore configurator tools (available on Dortania’s guide).
Step 2: Create a macOS Installer
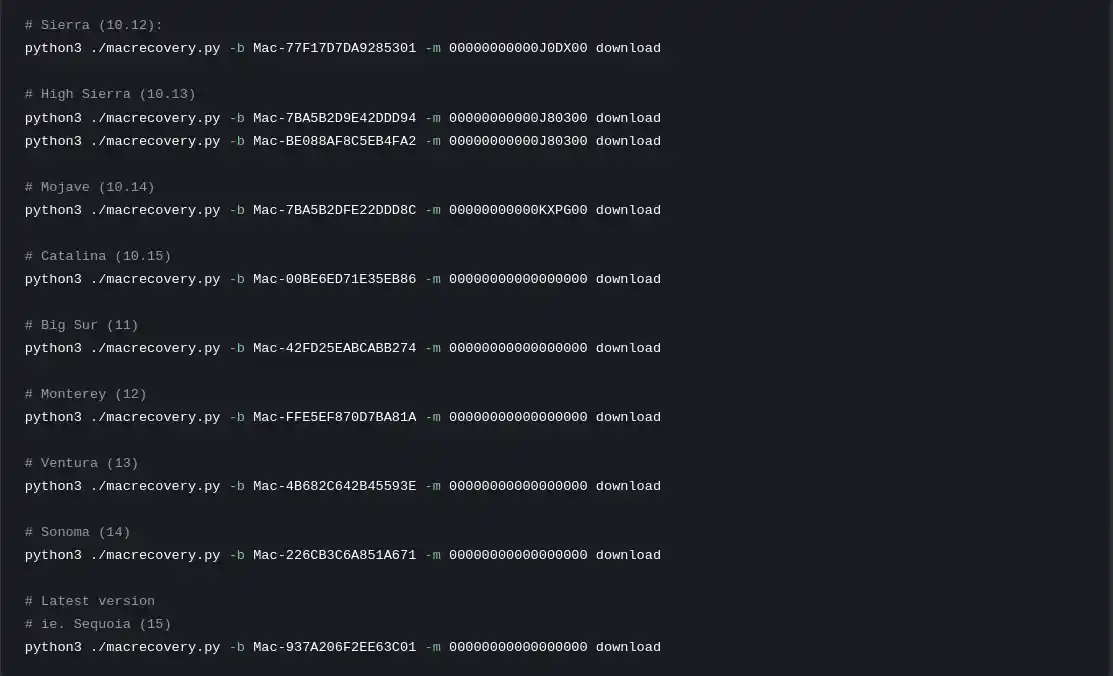
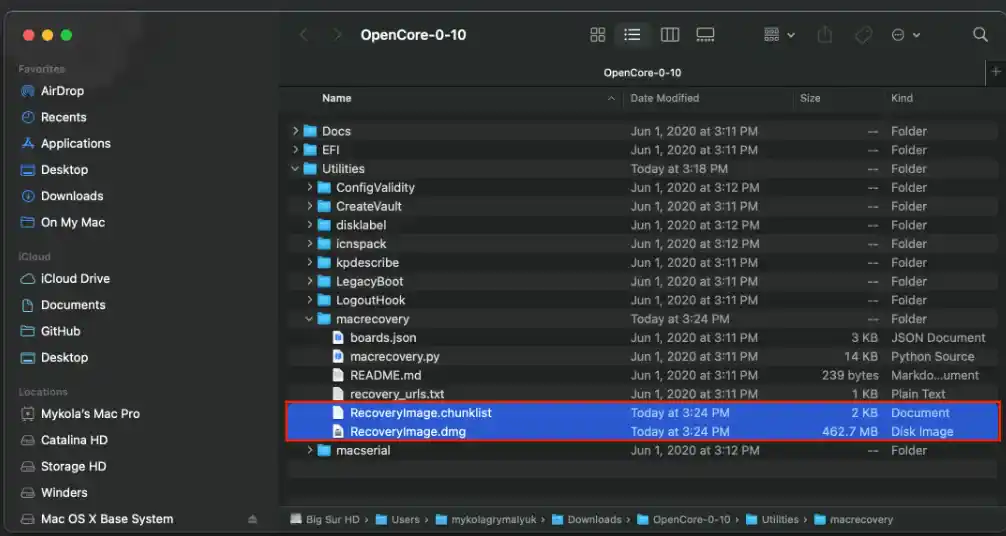
- Download macOS from the Mac App Store (e.g., macOS Ventura) or from Dortain page.
- Use the
createinstallmediacommand in Terminal to write the installer to your USB drive:bash
Copy code


Step 3: Set Up OpenCore
- Download the OpenCore package and extract it.
- Configure the
config.plistusing ProperTree. - Place appropriate kexts, SSDTs, and drivers in the EFI folder. Use Dortania’s guide to find the right files for your hardware.

5. Building up the EFI
1.Know your configuration
- Download CPUz to know your CPU generation
- Download the same EFI from here or you can build your own.
- Put the recovery and the EFI on your flash drives
- Configure the
config.plistusing ProperTree. - Place appropriate kexts, SSDTs, and drivers in the EFI folder. Use Dortania’s guide to find the right files for your hardware.
6. Installing macOS
Step 1: BIOS Configuration
- Update your motherboard’s BIOS to the latest version.
- Change these settings:
Disable Secure Boot.
Enable AHCI for SATA.
Set XHCI Hand-Off to Enabled.
Disable Fast Boot and any Windows-specific optimizations.
Step 2: Boot from USB
- Plug in the USB and boot into the BIOS boot menu.
- Select the USB drive to start the OpenCore bootloader.
- Follow the macOS installation steps. Partition the drive as APFS.
7. Post-Installation Setup
1. Transfer OpenCore to EFI Partition:
- Mount the EFI partition of your main macOS drive.
- Copy the EFI folder from your USB to the partition.
2. Fix Audio, Graphics, and Networking:
- Install kexts for missing functionality (e.g., AppleALC.kext for audio, IntelMausi.kext for Ethernet).
- Verify graphics acceleration with
About This Mac.
3. Generate SMBIOS:
- Use GenSMBIOS to generate unique serial numbers for iMessage and iCloud compatibility.
8. Troubleshooting Common Issues
Problem: Stuck at Boot
- Solution: Check for verbose boot errors (
-vflag) and ensure all kexts are updated.
Problem: No Audio
- Solution: Confirm the correct layout ID in
config.plist.
Problem: Kernel Panic
- Solution: Identify incompatible kexts or incorrect BIOS settings.
Conclusion
About Hackintosh: It’s important to maintain a realistic mindset. Small issues are to be expected. Some functions may not work or have poor experiences (e.g., trackpad, pointing stick, touch screen, Thunderbolt port, etc.). System instability, frequent crashes, failure to recognize boot options, or issues when upgrading the system are all normal.
Before upgrading, first research whether there are any significant changes to drivers. Upgrade Clover and relevant kexts before upgrading the system. Be sure to apply or update necessary patches. Do not wait until problems occur to seek solutions.
When encountering issues, first look for solutions online. If you can’t resolve the problem, only then ask for help. When requesting assistance, be polite, clearly describe the issue, and provide logs or relevant files if possible. If you can’t provide files, take clear photos of the issue.
Solving problems is your own responsibility, not someone else’s. When someone helps you, it’s out of kindness, not obligation.
Additional Links:
- https://github.com/GHOST117s/MAC_EFI
- https://github.com/dortania/dortania.github.io
- https://github.com/CloverHackyColor/CloverBootloader


